Showing posts with label food. Show all posts

February 4, 2022

DIY Combined Aquaponics and Hydroponics Gravity-fed Food and Fish Production System

Let me tell you a little bit about a cool aquaponics and hydroponics food production system that I’ve built on a small scale several times using very simple parts and with great success. A combined aquaponics and hydroponics gravity-fed food and fish production system is just what it sounds like- you grow plants and fish together in one system. There is no dirt or soil for the plants, but instead, they are fed from the water containing fish waste that is recycled through the system. In turn, the nutrients released by the plants and the ecosystem that is created will begin to feed your fish as well as to sustain a healthy oxygenated water environment.


The first DIY aquaponics/ hydroponics system in production.

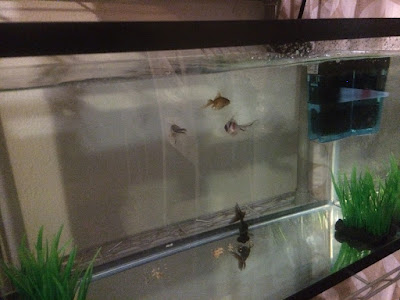
For the system displayed in the photos, you will need one standard aquarium pump to move the water from the bottom container or holding tank up to the very top container. The system then filters the water through the plants utilizing gravity to move through each catchment level in the system.

For plant growing medium, you can use small stones, pebbles, or the clay hydroponic growing medium. Hydroponic clay growing mediums are expensive so I usually opt to use small stones and pebbles from any standard landscape supply. Use larger stones by the drainage tubes and smaller pebbles in your planting area. Do not use any dirt or sand in your plant beds as this will clog your system and is unnecessary. The plants and pebbles will filter the water adequately and provide an ecosystem for your plants to thrive in.

In the first DIY system built, I used goldfish because they are very hearty fish and I wanted to make sure that I didn’t kill them easily. I’ve built three systems sense and I’m now using catfish because this is a fish I would like to grow and eat myself. Catfish do not require a lot of heating unless it gets to freezing temperatures so in my climate they work well. Tilapia are also a good choice if you can provide heat in the winter and trout is a great choice to grow in colder climates. You might start with goldfish to start your system, but do not grow goldfish with any of these other fish types. Goldfish waste can be toxic to other fish.

Monitor your combined aquaponics and hydroponics system closely for health. Watch for stress points like when you first add the fish and the plants are small or when the plants are large and you harvest the fish it will stress the plants. Look for signs of stressors, such as wilting or sickly plants, cloudy water, dying fish, or too much algae growing. You want some algae and bacteria and a healthy system because this is what will eventually feed your fish. When first starting your system, you will need to feed your fish, but as your system matures, the fish will begin to feed on the algae and particulates created.


Arrange your growing containers with the plants planting bed at the top then have that feed into a containment area in the middle for an overflow, and lastly at the bottom of the gravity-fed system have your fish. Consider paying a little bit more for the plastic irrigation tubing that is meant for drinking water pipes (PVC). You’ll need to slowly add water and run the system for several days without any plants and fish to make sure that your bacteria environment is starting to grow in a healthy way. Do not add any chemicals to the water for the fish, as these chemicals will be absorbed by your plants that you're adding. Also, consider light needs: install an indoor growing lamp over the plants at the top or place everything in front of a sunny window.


Small systems can be built without need for a pump, but water quality must be monitored even more carefully.

A combined Aquaponics and hydroponics gravity-fed food and fish growing system is really not as complicated as it seems. Once you start building your own DIY system and see how the fish and plants feed each other, you’ll be hooked too. The best part is when you begin harvesting your fresh fish and vegetables right from your DIY system. Happy growing!

#amberclee

July 28, 2013

Growing Basil...

My basil has really taken off in the garden and now I'm looking for creative ways to use this delicious herb. I'm growing two types: dark opal basil and the well-known sweet basil type. Their aroma is so strong every time you brush against them or water.


The best use I've found for both basils being grown is to make a pesto. Pesto is made from fresh basil, garlic, parsley, salt, pine nuts (or walnuts), olive oil, and romano (or parmesan) cheese. You can even leave out the cheese and freeze the pesto for a delicious addition or spread anytime. Look at this pesto over mozzarella picture I found:


So simple and so delicious!

September 5, 2008

Free and Easy... Meatless Meals

Looking for some good, easy recipes that don't contain red meat? Check these out:


Saucy Chicken

Prep Time: 10 minutes

Cook Time: 45 minutes

Ingredients:
-6 boneless, skinless chicken breasts
-2 cups salsa
-1/3 cup brown sugar
-2 tbsp honey dijon mustard

Prep:
Preheat oven to 350 degrees F. Combine all ingredients and place in 13x9" pan. Bake at 350 degrees F for 40-45 minutes until chicken is thoroughly cooked.


Turkey Lasagna

Prep time: 1 hour, including cooking time

Ingredients:
-1 tsp olive oil
-1 lb ground turkey breast
-2 cloves garlic, crushed
-8 oz can tomato sauce
-28 oz can crushed tomatoes
-salt and pepper to taste
-1 tsp Italian seasoning
-12 oz shredded low-moisture, part-skim mozzarella cheese
-12 oz part-skim ricotta cheese
-3/4 cup grated parmesan cheese
-6 no-boil lasagna noodles (about 3.5x7")

Prep:
Spray baking dish with cooking spray and preheat oven to 375 degrees F. Brown turkey with olive oil and garlic. Add tomato sauce, tomatoes, salt/pepper, and seasoning. Simmer 20 minutes. Assemble lasagna, layering sauce, then 2 noodles, then cheese, then more sauce, etc.. Sprinkle with parmesan as top layer. Bake uncovered for 30 minutes. Remove from oven and let rest for 10 minutes before cutting.


Broccoli Frittata


Prep time: 10 minutes

Cook time: 10 minutes

Ingredients:
-4 tbsp butter
-2 tbsp olive oil
-2 cloves garlic, minced
-2 cups frozen or fresh broccoli, well drained if frozen
-1 cup chopped plum tomatoes, drained
-1-1/2 cups coarse toasted bread crumbs
-10 eggs, beaten
-salt and pepper to taste
-1 cup cheese (Havarti, cheddar, or mozzarella; you pick)
-1/4 cup grated parmesan cheese

Prep:
Preheat oven to 350 degrees F. In a heavy skillet, melt 2 tbsp butter in 2 tbsp olive oil until slightly foamy. Add garlic and broccoli to cook, stirring, for 2-3 minutes until garlic is fragrant. Add bread crumbs and cook while stirring for 2-3 minutes. Set aside. In another skillet, melt remaining 2 tbsp butter over medium heat to coat pan. Season eggs with salt and pepper and pour into skillet. Cook for 2 minutes, then top with bread crumb mixture, tomatoes, and chosen cheese. Stir gently, then either transfer the pan to the oven (or you can transfer the mixture to a glass pie pan, then put in oven). Bake at 350 degrees F for 15-20 minutes until eggs are set. Top with parmesan cheese and serve.


All of these meals taste great! I especially love the frittata, which you can add all kinds of vegetables to- carrots, asparagus, potatoes, avocados, or spinach.

Popular Posts

(adsbygoogle = window.adsbygoogle || []).push({});